|
INTRODUCTION: SO WHAT IS INVASION OF MERIDELL? Experienced gamers will recognise Invasion Of Meridell - IoM for short - as a simple wargame. Yes, I said 'simple'! IoM has a LOT less rules than many of the RL games. But it's still complex enough to be a real challenge for complete beginners to get to grips with. My owner Tskaaron has been playing games like this for some 15 years, and helped me learn everything I know about becoming an IoM champion! (Check out the lovely gold trophy on Tskaaron's lookup!)
 You have a game board around which you move your troops, who have to fulfil certain aims; on the other side of the board are the enemy troops, who will attack you and try to prevent you carrying out your aims. The game board here represents the Neopian world of Meridell; your troops are Meridell citizens, trying to defend their home from the evil, warped Invaders. You have a game board around which you move your troops, who have to fulfil certain aims; on the other side of the board are the enemy troops, who will attack you and try to prevent you carrying out your aims. The game board here represents the Neopian world of Meridell; your troops are Meridell citizens, trying to defend their home from the evil, warped Invaders.
This page is an in depth guide, and it's a lot to try to take in all at once. If you haven't already done so, you should take a look at the instructions and strategy guide for IoM, and those of you who are keen to play can start from there; this page is best kept for more detailed reference as you progress through the game. I have tried not to repeat anything that appears on Neopets's IoM guidance pages except where I felt it would benefit from being explained in a bit more depth.
|
THE AIM OF THE GAME It's really very simple, but a lot of people tend forget that the aim of the game is to save all the villages from being sacked by the Invaders - NOT to convert all the Invaders into allies! Yes, saving the villages can ultimately only be done by saving all the Invaders. But some people are so busy doing the latter that they forget about the villages altogether, which leads to serious tactical errors.
 This is what the all-important villages look like. This is what the all-important villages look like.
There may be occasions when you feel that you are forced to sacrifice a village so that your troops can survive, but remember that you can afford to lose no more than THREE villages - lose a fourth and it's game over! So the bottom line here is, never forget to protect your villages!
|
YOUR TROOPS You start with five fighters. In each successful battle you gain new fighters, but at the end of every battle you have to choose to discard all but five of these to carry on to the next battle. As a general rule, you stick with the five that you started with: because if you've been doing things right, these have been accumulating bonuses since the first battle, whereas any additional fighters you gain will be newbies with no special qualities. Plus in sticking with your original fighters you have a balance of every species, each one with their own strengths.
I have read several other IoM guides, and many of them advocate dumping your Techo, or even your Moehog, to pick up a saved fighter of another, stronger species. These guides have been written by people who have also achieved superb scores at IoM so obviously this strategy works for them; you may feel it is worth trying. But I am staying firm in the belief that the best army is a well-balanced army made up of the five different species of fighters available.
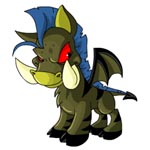
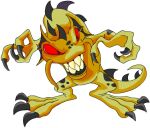
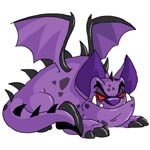
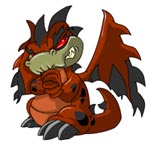
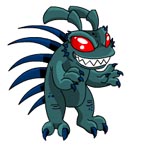
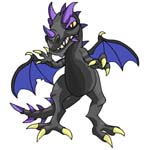
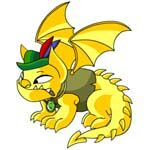
These are the five species in the game, and you start with one of each on your side:
 Moehog - the weakest of the fighters at the outset, but what they lack in hardiness they make up for in speed. Moehog - the weakest of the fighters at the outset, but what they lack in hardiness they make up for in speed.
 Skeith - strong but slow. Your best attacker through at least the first 2-3 missions, and with the right items also becomes much more flexible moving around the board. Skeith - strong but slow. Your best attacker through at least the first 2-3 missions, and with the right items also becomes much more flexible moving around the board.
 Techo - the least specialised of your fighters, but can become an excellent all-rounder when given the right items. Techo - the least specialised of your fighters, but can become an excellent all-rounder when given the right items.
 Scorchio - unremarkable in early missions, but you want to try to get this one to Soldier rank pretty swiftly! (Look below for rankings.) See Attack Items for why. Scorchio - unremarkable in early missions, but you want to try to get this one to Soldier rank pretty swiftly! (Look below for rankings.) See Attack Items for why.
 Grundo - seems fairly weak and insignificant at first, but get hold of some magic items and in the later battles your Grundo will become THE indispensable one of your troops. Grundo - seems fairly weak and insignificant at first, but get hold of some magic items and in the later battles your Grundo will become THE indispensable one of your troops.
Choose names for your fighters when you start to make them more easily distinguished from any converted Invaders of the same species. Try to have these five make as many of the saves as possible; and it is really important that you work on getting them the best items to boost their attack and defence. (That said, never forget your main aim! If there is a really good item positioned somewhere on the board where it is difficult to reach, don't allow your villages to be left exposed to attack while your fighter races off for that item.)
|
MOVING AROUND THE BOARD: SOME STRATEGY TIPS The success of winning the game is almost entirely dependent on how cleverly you manage to move your fighters around the board to fight off the enemy (there is a small element of luck when you come to engage your troops in combat). This involves getting into the best position relative to all the other pieces on the board: this is made more difficult by the fact that some of the pieces (the enemy Invaders) are moving around independently of your control.
Moving your fighters You are allowed five moves each turn. You can use each move for a different fighter, or you can choose to move the same two or three fighters several times. Each can only move a certain number of times, depending on their species (if you look a little way below the game board it tells you how many moves each species can make in one turn). If you are nearing the end of the battle and have no use for all five moves, you can choose to end your turn early.
Generally speaking it makes sense to move all (or nearly all) of your fighters up into a defensive line in front of the villages at the outset; having your troops in a position to defend the villages from the Invaders being the most important thing. But you might want to give some extra moves to those fighters who are in a position to grab any decent items that are sitting around the board.
Before you start moving your fighters, you may want to check out your opponents' stats - you can do this by clicking on 'Fixed Full' in the top right hand corner of the screen with the game board - and deciding which of the Invaders you want to target first. It is usually best to target your earliest attacks against the weakest Invaders; that is, those with the lowest defence. (Though you also have to take into account the attack bonus of your fighter who will be doing the attacking - see here for a more detailed account of how combat works.) Also keep an eye out for which Invaders have the highest attack, as these are the ones who can do most damage to your troops.
Once you have managed to save a couple of the Invaders the fight usually starts to get a lot easier. But if the converted Invaders are too weak to defend themselves, you may want to think of moving them out of reach of the remainder of the Invaders so that they are not reconverted to the enemy side. (And even if they are decent fighters, it is best to carry on combat with your original five fighters as far as possible, for the reasons given above.)
 Predicting how the Invaders will move Predicting how the Invaders will move 
Being able to predict what your enemy will do is a great help in battle. The first thing they do is, obviously, advance across the board, to where your fighters and the villages you are protecting await them. At this stage they will advance in a straight line unless there is a mountain in their way, in which case they move diagonally around it. If there is an item in their path they can move onto that square and the item will vanish, though the Invader is unable to make any use of this other than simply depriving your troops of it.
When they reach a square adjacent to one of your fighters they will attack at the first possible opportunity - UNLESS there is also a village in one of the squares adjacent to the Invader. If they have a choice of attacking a fighter or sacking a village, they will choose the village; the only way to stop this happening is to save that Invader before the end of your turn.
The number of moves in the enemy's turn depends entirely on the number of Invaders left on the board. Each Invader will make one move with each and every turn, regardless of their species. The INTELLIGENCE of their moves, however, does seem depend on their species. The easy Moehog Invaders tend just to advance in vertical lines down the board until they walk into an enemy to hit or a village to sack, whereas the more cunning Scorchios and Grundos may move in a variety of directions with the aim of following or ganging up on your fighters. (Or maybe it just seems that way because the Moehogs tend to be converted very quickly before they have a chance to do anything sneaky...!)
Know your enemy: above, the First Wave Invaders in order of easiest (Moehog) to hardest (Grundo). You face a new enemy in each mission. In the first mission, there will be 5 Moehogs to defeat in each one of the three battles; in the second mission you will be expected to defeat 6 Techos... and so the number of Invaders increases, and with each species the individual Invaders are tougher than in the mission before!
UPDATE: I have taken the liberty of copying the table below from the IoM guide on GoldEyeGriffin's page.
I is the Invader. The numbers are a guide to which one of your fighters the Invader will attack, given that there is a choice: the Invader will attack the fighter that is the lowest number in the table above.
As far as I have been able to test it, the information in this table is certainly accurate as regards the First Wave of Invaders. There have been reports of the Second Wave Invaders (even the five original species) having a different attack pattern, but I cannot personally confirm these reports.
 In the Second Wave, you will meet the same five species of Invader as above, and in the same order, but here there is an additional element: meet the Invader Buzz! The Buzz is an exception to most of the rules above. Rather than attack your fighters it prefers to dodge them, then make a bee-line (well, Buzz-line) towards towards your villages, where these powerful Invaders will can havoc. You will need a solid line of fighters in their path to stop them sacking your villages! In the Second Wave, you will meet the same five species of Invader as above, and in the same order, but here there is an additional element: meet the Invader Buzz! The Buzz is an exception to most of the rules above. Rather than attack your fighters it prefers to dodge them, then make a bee-line (well, Buzz-line) towards towards your villages, where these powerful Invaders will can havoc. You will need a solid line of fighters in their path to stop them sacking your villages!
 In Mission Eight comes the Grarrl, even more powerful than the Buzz, and like the Buzz intent only upon sacking villages. Neither Buzz nor Grarrl can be converted. If you are powerful enough to be able to reduce the health of one of these Invaders to 0, it will simpy vanish in a puff of smoke. (It still counts as making a save though!) In Mission Eight comes the Grarrl, even more powerful than the Buzz, and like the Buzz intent only upon sacking villages. Neither Buzz nor Grarrl can be converted. If you are powerful enough to be able to reduce the health of one of these Invaders to 0, it will simpy vanish in a puff of smoke. (It still counts as making a save though!)
 When a Buzz or Grarrl is conquered, it will leave behind it a smoking crater, upon which your troops cannot tread. When a Buzz or Grarrl is conquered, it will leave behind it a smoking crater, upon which your troops cannot tread.
|
SAVES AND RANKS Every time one of your fighters manages to convert an invader it is called making a SAVE. An Invader is converted back to its good Meridell self - saved - when it's health is reduced to 0. The more saves you can make the better, as fighters with several saves will increase in RANK. These are the ranks:
With no saves, a fighter starts as a Villager
With THREE saves, a fighter becomes a Defender
With NINE saves, a fighter becomes a Soldier
With THIRTY-TWO saves, a fighter becomes a Captain
With SIXTY-FOUR saves, a fighter becomes a Lieutenant
The highest rank is that of Corporal ...I no longer have the number required to reach Corporal rank, as the introduction of the Second Wave means that things have been changed. (Thanks to all who have neomailed to help update this section!)
Every time a fighter increases in rank they are given an extra point of attack and defence strength (up to their maximum level, which in the First Wave is 18 attack, 14 defence). So as a general rule you want each of your fighters to make several saves to help improve their stats, but don't let any one get too far ahead of the rest! It is far better to have a well-balanced army of five Soldiers than four weak fighters under a powerful Captain or Lieutenant. One strong fighter cannot save the game alone, you will need to have good fighters spread out in a defensive line across the board.
When you are down to just one Invader left, you may wish to let one of your unimportant fighters be reconverted back into an Invader, so that your troops can make more saves. Theoretically you can carry on doing this indefinitely, and so boost the ranks of your troops much faster! However prolonging the battle this way can be risky; I strongly advise that you only try this tactic if you are very confident that you know what you are doing! (See the table above to help with this.) Be aware also that your fighter cannot usefully increase in rank more than ONCE per mission. If your fighter increases rank a second time in a mission, no bonus will be received for their advancement!
  You also have your own rank, which increases as you progress through the game! - Can you make it from an insignificant Stablehand to a mighty Lord? You also have your own rank, which increases as you progress through the game! - Can you make it from an insignificant Stablehand to a mighty Lord?
|
VITAL STATISTICS Stats are made up of three things: health, attack strength, and defence strength. It is strongly advised that to see full details of both sets of troops' stats during the game, along with the items your fighters are carrying, you click on 'Fixed Full' in the top right hand corner of the screen: otherwise you will be shown only the health of your fighters and the Invaders.
Hit points (hp) represent the health of the fighter. In the First Wave, your fighter is on full health with 18hps, and no matter how hard you try to heal them their hps will never rise above 18. In the Second Wave, your fighters hps can be as high as 21 (despite the fact that it still said 'max 18' at the top of the stats when I last checked). If any fighter's hps fall to 0 or lower, they are converted into an Invader! (Note that if this happens to one of your fighters, even if you manage to convert them back they will not regain any bonuses they had gathered throughout earlier battles.) Likewise an Invader is converted back to a normal Meridell citizen and becomes one of your fighters if you reduce its hps to 0.
Attack strength represents how good a fighter is at hitting things. The higher a fighter's attack, the more damage they are likely to do when they attack an enemy. This is primarily based off the SECOND number of the attack strength. (For full details of how this works see below.) For example a Skeith invariably starts with an attack of 18 + 4. The '18' is the Skeith's base attack strength, but it is the bonus number, the '4', that really affects how good your fighter is at hitting things. The bonuses are as follows:
Attack strength |
Bonus |
9-11 |
+ 1 |
12-14 |
+ 2 |
15-17 |
+ 3 |
18 |
+ 4 |
|
 |
So if your fighter has an attack of 8 or less (very low!) they will have no natural bonus at all. But all fighters can gain a bonus, or increase their existing bonus, by picking up a weapon. (See attack items below.) In the Second Wave your fighter's base attack can be improved beyond 18 - I am told that an attack strength of 19 will give an attack bonus (independant of weapon) of +5.
Defence strength represents how good a fighter is at avoiding damage when attacked. Like attack it can be composed of two numbers. The base defence can never rise above 14; while the bonus comes entirely from whatever defence item the fighter is carrying, so if your fighter has no defence item then they have no bonus. Add the two numbers together to get the overall level of defence for your fighter, for example a defence of 14 + 7 (a superb defence!) = total defence of 21.
...The above information is given in terms of your own troops, but the enemy troops have stats that work in just the same basic way. The only real difference is that their base stats can be higher than those of your fighters; but on the other hand the Invaders cannot use items to get any bonuses.
|
HOW COMBAT WORKS This is the nasty technical maths bit - it can really help you if you understand this, because it lets you work out EXACTLY how much damage your fighter could do to an opponent, and vice versa. But those who aren't good with numbers, or who just want a general idea of how the game works, should probably skip this bit and maybe refer back to it later if you think you need to.
To understand how combat works, the first thing you need to do is to set the display of your fighters' stats to 'Fixed Full' by clicking on the link in the top right hand corner of the game board screen. This will show the complete stats for both your troops and the Invaders, and when you engage in combat it will show how well you rolled your virtual die from 1-20: the random element of the game, with a 20 doing the most damage and a very low roll missing altogether.
How hard your fighter hits is based on adding together the SECOND number of the fighter's attack and the number that they roll between 1 and 20. For example, if your fighter has an attack strength of 18 + 4 and rolls an 11, they will hit with a strength of 15 (4 + 11 = 15).
To summarise:
B + R = S
Where B is the fighter's attack Bonus,
R is the number that they Roll when attacking,
and S is the Strength of their hit. Even the hardest hits are restricted in how much injury they can inflict on an opponent. How much damage a hit of strength 15 will do depends on the defence of the individual being attacked. The damage is the strength of the hit minus the defence of the opponent. So, if your opponent only has a defence of 8, then your 15 strength hit will do 7hps damage (15 - 8 = 7). If your opponent has a defence of 15 or more, then a hit of strength 15 will not damage them at all.
To summarise:
S - D = I
Where S is the Strength of the hit the attacker makes,
D is their opponent's Defence,
and I is the final Injury, or damage, done to the opponent. When the Invaders attack your fighters it won't tell you how much they have rolled for, just how much damage they did; but it is based off exactly the same system. So you can use this to work out what is the maximum damage your fighter can take in a round, by looking at the defence strength of your fighter and the attack strength of any adjacent Invaders (it won't tell you the bonus attack of the Invader, but you can work it out from the table in the stats guide above).
Assume that every Invader who is in a position to hit your fighter will roll a 20 and you can use the formulae above to work out what is the worst possible damage they can do to your fighter in a single enemy turn. Of course it is very unlikely that the Invaders will all roll 20s; and if the Invaders have more than one fighter within target range, you can only guess at which ones they will try to attack. This is where you have to take a calculated risk, but it helps to be able to work out your odds of survival.
|
USEFUL ITEMS Aside from mountains, villages, and troops, you will see several kinds of items dotted about the game board. There are four kinds of items: healing potions (fairly obvious how to use these, just try to land your fighters on one of these when their hit points are low); Lost Items (which are in a separate section later); items which boost your fighter's attack bonus; and items which boost your fighter's defence. (See the sections on stats and combat if you aren't sure how attack and defence work.)
Two healing potions will be around the centre of the board in each battle. Attack and defence items - again two of each - will be distributed randomly around the lower half of the board at the beginning of each battle. If an Invader should move onto a square occupied by any of these items the item will vanish, though the Invader cannot make use of it. The most powerful items won't start to appear until the later battles. But almost every attack and defence item works better for one species than for any of the others.
Attack Items (First Wave)
 Mace - the most basic attack item, gives + 1 to the attack of any fighter. Mace - the most basic attack item, gives + 1 to the attack of any fighter.
 Broadsword - another basic weapon, gives + 1 to everyone except Techo, to whom it gives + 3. Broadsword - another basic weapon, gives + 1 to everyone except Techo, to whom it gives + 3.
 Hammer - gives + 2 to a fighter of any species. Hammer - gives + 2 to a fighter of any species.
 Berserker Battleaxe - this weapon gives + 3 to attack but can only be used by a fighter who has a base attack of at least 14. Really it has been designed for the Skeith - when used with an Amulet of Teleportation it means your Skeith can have 2 moves in a turn instead of the usual 1. Berserker Battleaxe - this weapon gives + 3 to attack but can only be used by a fighter who has a base attack of at least 14. Really it has been designed for the Skeith - when used with an Amulet of Teleportation it means your Skeith can have 2 moves in a turn instead of the usual 1.
 Bow - gives + 2 to any pet except the Scorchio, to whom it gives + 4. What is more, a Scorchio ranked Soldier or higher (see ranks above) can use this weapon to attack enemies from up to 2 squares away - an EXTREMELY useful ability! Bow - gives + 2 to any pet except the Scorchio, to whom it gives + 4. What is more, a Scorchio ranked Soldier or higher (see ranks above) can use this weapon to attack enemies from up to 2 squares away - an EXTREMELY useful ability!
 Magic Force Spell - gives + 3 to any species but becomes the Ultimate Item in the hands of a Grundo! Not only does it gives the Grundo + 5 to attack (making it potentially stronger than even a Skeith), it means that, with certain restrictions, your Grundo can bestow healing on any other of your fighters from anywhere on the board. Magic Force Spell - gives + 3 to any species but becomes the Ultimate Item in the hands of a Grundo! Not only does it gives the Grundo + 5 to attack (making it potentially stronger than even a Skeith), it means that, with certain restrictions, your Grundo can bestow healing on any other of your fighters from anywhere on the board.
Attack Items (Second Wave)
 Double Sword - worth + 4, + 6 in the hands of a Techo. This weapon also has a very nice special ability: whenever it hits it is guaranteed to do at least six points of damage. (Unfortunately it is not guaranteed to hit...) Double Sword - worth + 4, + 6 in the hands of a Techo. This weapon also has a very nice special ability: whenever it hits it is guaranteed to do at least six points of damage. (Unfortunately it is not guaranteed to hit...)
 Halberd - +4 attack; also gives the fighter wielding it unlimited moves (up to your maximum per turn, ie 5). However in the case of the Skeith, this does not seem to work in conjuncion with teleporting; as soon as the Skeith wielding this weapon teleports he is immobilised for the rest of that turn. Halberd - +4 attack; also gives the fighter wielding it unlimited moves (up to your maximum per turn, ie 5). However in the case of the Skeith, this does not seem to work in conjuncion with teleporting; as soon as the Skeith wielding this weapon teleports he is immobilised for the rest of that turn.
 Magic Lightning Spell - an unimpressive +2 to most species, but +4 for the Grundo, who can also use this weapon to hit Invaders from 2 spaces away, or heal multiple fighters in one move. Magic Lightning Spell - an unimpressive +2 to most species, but +4 for the Grundo, who can also use this weapon to hit Invaders from 2 spaces away, or heal multiple fighters in one move.
 Double Axe - + 5 attack, is guaranteed to do at least 5 points of damage when it hits (is not guaranteed to hit). Double Axe - + 5 attack, is guaranteed to do at least 5 points of damage when it hits (is not guaranteed to hit).
Defence Items (First Wave)
 Magic Staff of Thunder - basic defence item giving + 1 defence to any species except Grundo, who gets + 3. Magic Staff of Thunder - basic defence item giving + 1 defence to any species except Grundo, who gets + 3.
 Amulet of Teleportation - this gives + 2 to every species except Skeith, who now gets +4. Skeiths are also the only species who can make use of this item to teleport to empty squares over all of the lower board. Amulet of Teleportation - this gives + 2 to every species except Skeith, who now gets +4. Skeiths are also the only species who can make use of this item to teleport to empty squares over all of the lower board.
 Helmet - gives + 5 to a Moehog, + 3 to every other species. Helmet - gives + 5 to a Moehog, + 3 to every other species.
 Magic Cloak of Invisibility - gives an impressive + 4 defence to any species but a truly awesome + 7 to a Grundo. (Essential for any Grundo fighter actually in combat at the highest levels, as even with a Magic Force Spell in hand Grundos still cannot heal themselves...) Magic Cloak of Invisibility - gives an impressive + 4 defence to any species but a truly awesome + 7 to a Grundo. (Essential for any Grundo fighter actually in combat at the highest levels, as even with a Magic Force Spell in hand Grundos still cannot heal themselves...)
 Shield - worth + 5 defence to every species except the Techo, who receives + 7. Shield - worth + 5 defence to every species except the Techo, who receives + 7.
Defence Items (Second Wave)  Leather Armour - gives +5, wearable by Scorchios, Techos, Moehogs Leather Armour - gives +5, wearable by Scorchios, Techos, Moehogs
 Chainmail - +6, now wearable by all species (was originally specialised). Chainmail - +6, now wearable by all species (was originally specialised).
 Plate Armour - + 7, wearable by Moehogs. Plate Armour - + 7, wearable by Moehogs.
|
LOST ITEMS Last, but by no means least, we come to Lost Items. These appear in the middle of the top row in the first battle of every mission; if you fail to get hold of them they will reappear in each battle that mission. If you haven't recaptured them by the end of the third and last battle in a mission they are lost for good, and a new item will appear in the next mission.
The Lost Items
 
   You do not NEED to get the Lost Items to successfully complete the game, but it does make things a lot easier if you do, and if you get them as quickly as possible in each mission - especially in the earliest missions where your fighters are at their weakest. Recapturing a Lost Item will boost the base attack and defence strength of every one of your fighters by one point each (up to the maximum level, which as mentioned before is 18 attack and 14 defence).
Grabbing the Lost Item quickly to boost your stats is usually a good thing: unfortunately there is a risk. If you lose the battle, you will be sent back to the start of that mission; but when the mission is restarted, the Lost Item will not be there if you have saved it already. This means your troops no longer have the opportunity to benefit from the stat boosts - how much of a problem this is depends on the stats of your troops (remember the Lost Item cannot boost them above the maximum levels.) So if you are worried about the strength of the enemy and think that there is a good chance that you will need more than one try to successfully complete the mission, it is probably best not to try for the Lost Item till near the end of the third battle. But in the easy missions try to get it as quickly as you safely can to help your fighters' stats.
You will probably need to defeat at least a couple of the Invaders before you get a decent chance to send a fighter off towards the Lost Item without leaving your villages too vulnerable. But don't wait too long, as because when there is only one Invader left on the board the Lost Item will vanish for the rest of the battle!
|
|